How to Manually Set Chrome on Windows to Use a Proxy
- Click the Chrome Menu icon on the browser toolbar.

- Click the “Settings” option.

- Scroll to bottom of page and click the “Advanced” button.

- Scroll down to the section for System and click “Open your computer’s proxy settings”.

- The Next Steps are similar but vary in appearance for different versions of Windows:
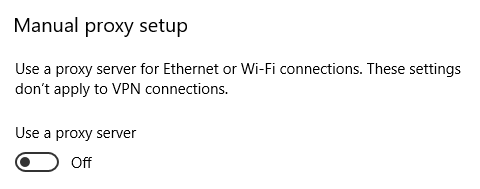
For Windows 10:- For Windows 10: The Windows Network Proxy Settings window should have opened, enable the “Use Proxy Server” switch in the Manual Proxy Setup section.

- For Windows 10: Adjust proxy settings in the Manual Proxy Setup section by entering proxy ip/domain and port and then clicking the “Save” button.

For Windows 7 and Below:
- For Windows 7 and below: The Windows Internet Properties window should have opened, click the “LAN Settings” button.

- For Windows 7 and below: Adjust your proxy settings by enabling the “Use A Proxy Server for your LAN” option and entering your ip/domain and port and then clicking the “OK” button.

- For Windows 10: The Windows Network Proxy Settings window should have opened, enable the “Use Proxy Server” switch in the Manual Proxy Setup section.
How to Set Chrome to Use a Proxy with an Extension
- Proxy SwitchyOmega – Manage and switch between multiple proxies quickly & easily.
- Falcon Proxy – Falcon Proxy. Simple, clear and easy to use.
- Proxy SwitchSharp – Deprecated. Please upgrade to SwitchyOmega instead.
To search for more Proxy Extensions for Chrome Web Browser click here.


